Trying out the Web SDK in an OpenAPI viewer
You can use an OpenAPI viewer to confirm your own application integration to Trust Protection Platform. You can also try the code samples from this guide. Trust Protection Platform supports the following viewers:
-
OpenAPI Explorer
-
Swagger
-
Redoc
Your system administrator selects whether this feature is enabled and which viewer is set by default in the Venafi Configuration Console. See Access Management for details.
IMPORTANT By design, the OpenAPI viewer operates only from an installed instance of Trust Protection Platform. The framework does not run on the documentation portal (docs.venafi.com). Because REST API calls can change data, be sure to run OpenAPI viewer calls only from your test Trust Protection Platform instance.
You do not have to use the default viewer set by your administrator. For information on using the viewer of your choice, see Trying out the Web SDK in an OpenAPI viewer.
Prerequisites
Applications that use Venafi REST APIs require an extra configuration. You can get the existing configuration from the API Integrations page. You need a valid Client ID as the client_id, and the corresponding scopes and restrictions. For more information, see Setting up token authentication.

OpenAPI Viewer not available for this site
You are on docs.venafi.com, so the OpenAPI viewer is not available from this page. If you were viewing this page on a correctly-configured Venafi server you would see the OpenAPI viewer below.
Follow these steps to see the OpenAPI viewer on your Venafi server.
To try out the Web SDK in an OpenAPI viewer
Trust Protection Platform includes three OpenAPI viewers, two of which allow you to submit API requests: Swagger and OpenAPI Explorer. The method to get a bearer token and submit request is slightly different for each viewer. Select the one you are using below, and then follow the instructions.
Step 1: Open OpenAPI Explorer
Using a web browser, access OpenAPI Explorer from the same URL that manages Trust Protection Platform. For example, https://TestTPP.example.com/VEDSDK/openapi-explorer.aspx. If the computer lacks a domain name or there is a problem in IIS, the site will be unreachable.
Step 2: (conditional) Get a bearer token
If you already have a bearer token, you can proceed to Step 3. If not, follow these steps:
-
In the left navigation, expand Authentication Server APIs, and then click Request a grant with user credentials.
-
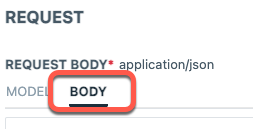
In the Request Body section, click the Body tab.

-
If you don't already have an API Integration set up, follow the steps in Setting up token authentication. After you have the API Integration created, copy the JSON example from the integration page.
Paste the JSON example into the Body field in OpenAPI Explorer.
EXAMPLE Sample JSON request
{
"username": "<your_username>",
"password": "<your_password>",
"client_id": "vcert-cli",
"scope": "certificate:manage,revoke;configuration:manage;ssh:manage"
}
-
Click Execute.
-
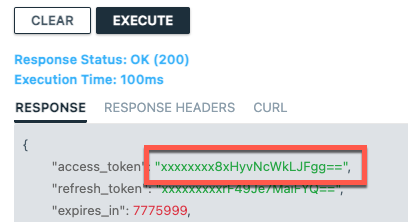
From the Response section, copy the access_token value.

Step 3: Enter the access token
-
In the left navigation, click Authentication.
-
Paste your bearer token into the api-token field, and then click Set.
This adds the access token to the header of every request submitted through OpenAPI Explorer. You can now browse the API endpoints in the navigation and submit requests directly from the OpenAPI Explorer UI.
Step 1: Open Swagger
Using a web browser, access Swagger from the same URL that manages Trust Protection Platform. For example, https://TestTPP.example.com/VEDSDK/swagger.aspx. If the computer lacks a domain name or there is a problem in IIS, the site will be unreachable.
Step 2: (conditional) Get a bearer token
If you already have a bearer token, you can proceed to Step 3. If not, follow these steps:
-
Scroll down to Authentication Server APIs, and then click POST vedauth/authorize/oauth - Request a grant with user credentials to expand it.
-
On the right side of the screen, click Try it out.
-
If you don't already have an API Integration set up, follow the steps in Setting up token authentication. After you have the API Integration created, copy the JSON example from the integration page.
Paste the JSON example into the Request body field in Swagger.
EXAMPLE Sample JSON request
{
"username": "<your_username>",
"password": "<your_password>",
"client_id": "vcert-cli",
"scope": "certificate:manage,revoke;configuration:manage;ssh:manage"
}
-
Click Execute.
-
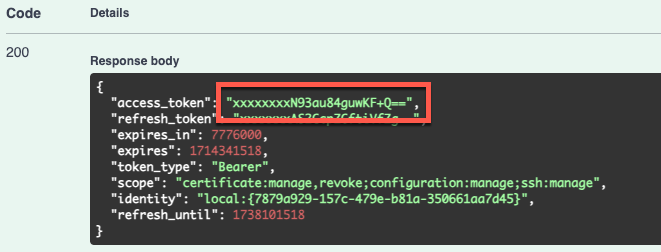
Scroll down to the Response body section, and copy the access_token value.

Step 3: Enter the access token
-
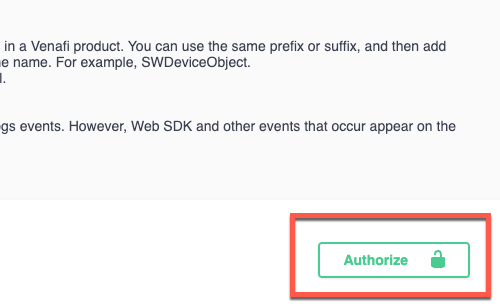
Scroll back to the top of the swagger UI, and click Authorize.

-
Paste your bearer token into the Access token field, and then click Authorize.
This adds the access token to the header of every request submitted through Swagger. You can now browse the API endpoints in the navigation and submit requests directly from the Swagger UI.