Configuring the Adaptable CA object
As with other Palo Alto Networks CA drivers, you should review the Getting started: automating certificate enrollment and provisioning section before setting up the Adaptable CA driver.
NOTE Before you attempt to create CA template, device, or application objects, you must enable the create permission under the folder where you want to create the new object. For more information, see Permissions overview.
To create and configure a new Adaptable CA template object
- From the Certificate Manager menu bar, click Policy Tree.
- From the Tree drop-down menu, click Policy.
- In the Policy tree, select the folder where you want to create the CA Template object, and then click Add.
- Click CA Template, then select Adaptable to create it.
- In the CA Name box, type a name for the new
-
Under Connection, do the following:
-
Using the Username Credential and Certificate Credential fields, select one or both credentials.
If your organization requires two-factor authentication, then specify both credentials.
-
(Optional) (Conditional) If you need to select another credential, then from the Secondary Credential field, select a username, certificate, password, or CyberArk credential object.
TIP Use this option to avoid having to hard code additional credentials in your script or having to utilize other solutions outside of Trust Protection Foundation.
-
(Optional) In the Service Address field, type the URL, FQDN, or IP address of your certificate authority API, according to how you've implemented this in your PowerShell script.
For example, https://domain.net, subdomain.domain.org, 123.456.1.2, or localhost.
Specifying the URL of your CA's API lets you use the same script to target different instances of the same CA vendor product. So this option is primarily applicable to CAs that are not available on the public Internet because those service addresses are the same for every customer.
The value you type is passed to your PowerShell script as the ServiceAddress variable of the General hash table. When the field is blank, an empty string is passed.
TIP Unless you're developing and testing a PowerShell script, configuring Service Address or Profile String is typically not something you'll need to do. The primary benefit of these settings is for third-party Palo Alto Networks partners, enabling the PowerShell scripts they provide to be used as-is without customers having to customize them.
A secondary benefit is that in the event that service URL or configuration changes are made, the values you specify are passed to every PowerShell function in your scripts automatically, preventing service interruptions and avoiding the need to update or re-validate your PowerShell scripts. For more information, see About automating PowerShell script updates following service URL and configuration changes.
-
(Optional) In the Profile String field, type the profile string used by your PowerShell script.
Specifying a certificate product, profile, or template lets you use the same script for different types of certificates supported by the target CA. This setting works with Service Address and depends on your script. For example, your script might reference the name of an identifier, a certificate product, profile, or template (e.g. x456-5424454:ssl_private:25423g-542352-2463).
The value you type is passed to your PowerShell script as the ProfileString variable of the General hash table. When the field is blank, an empty string is passed.
TIP This field is designed to provide flexibility to your implementation of a PowerShell script. If you're implementing the script, it's important that you verify the value specified is valid and uses the required syntax.
-
-
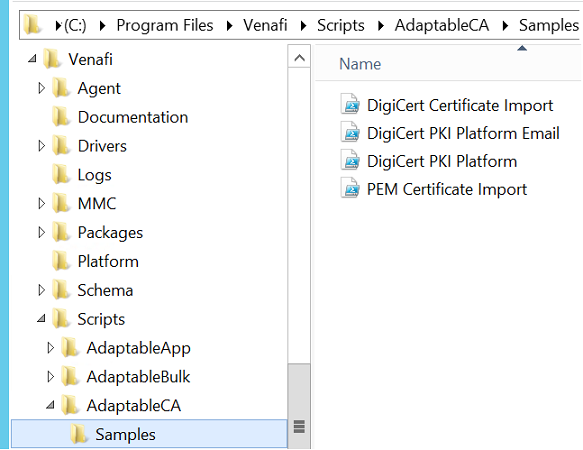
Select your Windows PowerShell script from the PowerShell Script list.
Scripts contained in the Program Files\Venafi\Scripts\AdaptableCA folder appear in this list.
-
To verify that functions are working, click Validate.
What does Validate do?
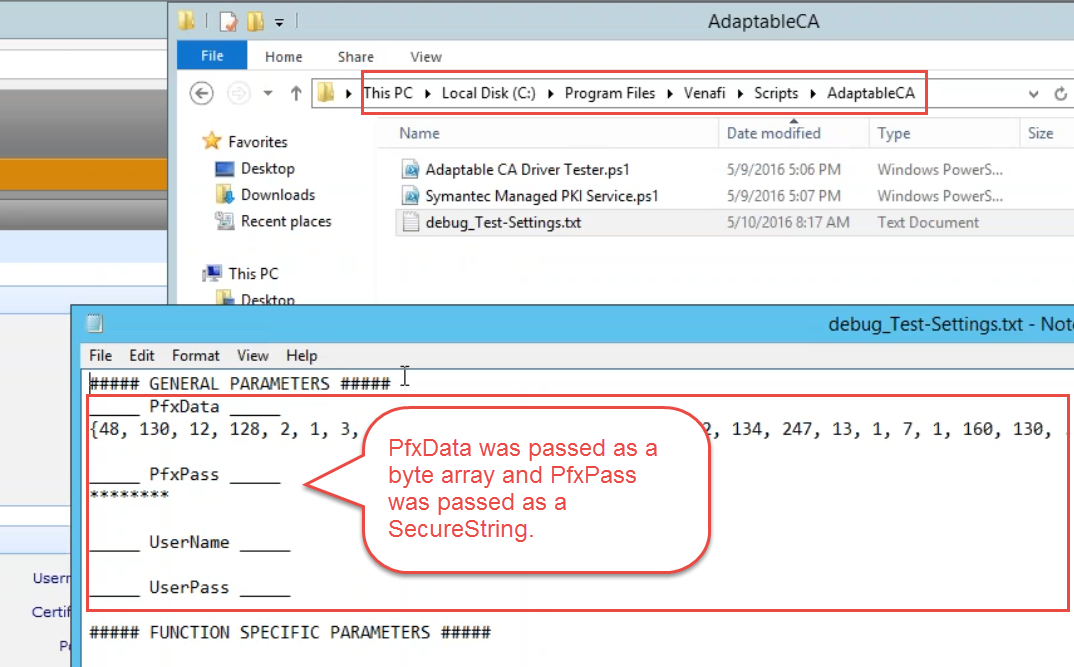
 When you click Validate, Trust Protection Foundation verifies if the required PowerShell functions are present in the selected PowerShell script and then executes the Test-Settings function. In addition, if you had obtained the testing utility from Palo Alto Networks Support (see Adaptable CA prerequisites), then the test script would also write a file for every method that gets called to show what data is getting returned. For example, if you had set the certificate credential, Trust Protection Foundation would have generated a text file showing the data that was sent to the test script:
-
Under Options, configure certificate replacement (sometimes called reissuance) by doing the following:
-
In the Renewal Window (days) field, specify how many days prior to the expiration of an existing certificate that the certificate should be renewed.
Any certificates that fall outside of the renewal window are handled through a replacement or reissuance.
- To enable renewal without changing the original expiration date, check Allow Reissuance.
-
(Optional) Select When script is updated, fix related certificate errors if you want Trust Protection Foundation to fix certificates affected by changes to the associated PowerShell script.
For more information about how changes to scripts can affect certificate enrollment, see Protecting against unapproved changes to Adaptable CA scripts.
-
-
(Optional) If you want to enhance troubleshooting capabilities of your Adaptable Flow, select the Enable Debug Logging check box.
For information about how enabling this option works with the PowerShell script, see in the Adaptable Flow PowerShell script reference.
-
Click Add / Remove to select the custom fields you want to include.
Data related to the custom fields you select is passed using the functions defined in the PowerShell script.
For more information about custom fields, see Working with custom fields.
- (Optional) If your application will connect to the Palo Alto NetworksWeb SDK, then complete the WebSDK OAuth Token Configuration settings:
Setting
Description
OAuth Token Application ID Enter the application ID of the API application integration you should have created previously, as described in Adaptable CA prerequisites. OAuth Token Credential Select the username credential of the service account that has been granted access to the Client ID of the API Application. See Adaptable CA prerequisites.
In this context, the username credential identifies the user (identity) for whom the token is being requested. It also verifies whether you have the required permissions within your organization to enable the script to authenticate as the selected user. This security measure prevents users from impersonating another user.
OAuth Token Scope (Optional) Enter one or more of the scopes assigned to your API application. For example, Certificates: Manage. Leave this field blank if you want to include all defined scopes.
To learn more about scopes and restrictions, see Scopes for token.
NOTE If your application is not connecting to the Web SDK, leave all of these fields blank.
-
(Conditional) If your script includes customized fields, enter the desired static text or macro commands.
Refer to the sample in the topic, Example: creating a ServiceNow incident for expiring certificates.
For more information about Palo Alto Networks's macros, see Macro commands.
- When you're finished, click Save.
-
IMPORTANT If you make changes to the PowerShell script used by an Adaptable CA, you must open the corresponding CA object and click Save to force the driver to re-read the script. Typically, the updated script becomes active in less than 60 seconds after saving the channel object.
- Click Save.
What's next?
After you create a CA object, you can select it from the Policy tree, and then view important information and manage various settings.
-
Click the General tab to view and modify log and permissions settings.
-
Click the Log sub-tab to view any logged events that are triggered by the template object.
IMPORTANT You must have the Read permission to view the Log tab.
For more information about options found on the Log tab, see Viewing log events.
-
On the Permissions sub-tab, you can configure the users or groups to whom you want to grant permissions to the new template object.
Consider managing object permissions via parent objects so that you can take advantage of inheritance. For more information, see Permission inheritance and flow down.
-