Importing Certificate Manager - SaaS and NextGen Trust Security certificates into Certificate Manager
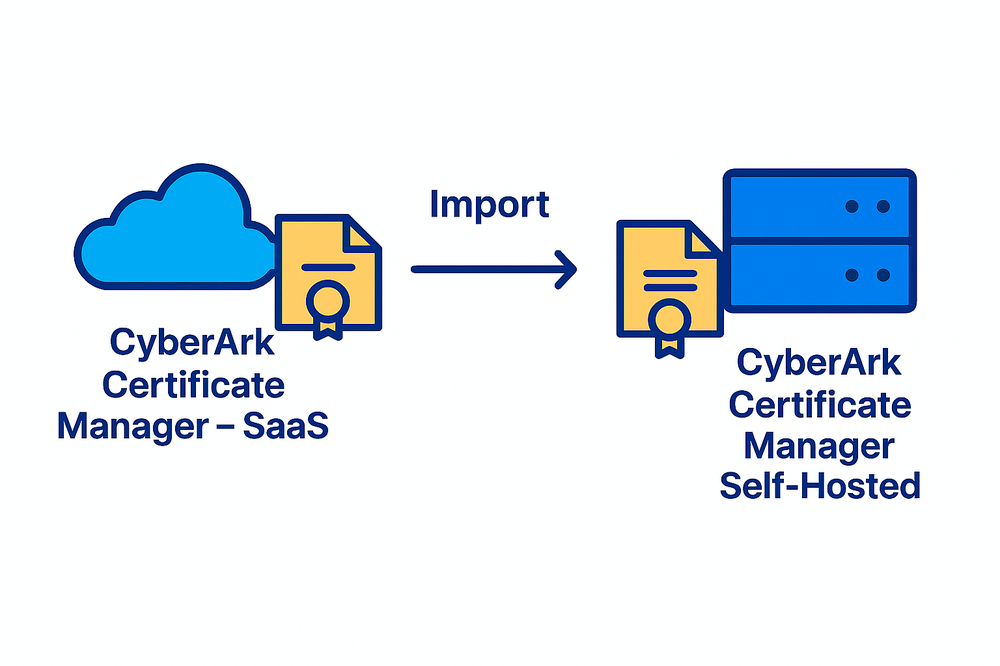
These jobs provide one-way visibility to support migration from Trust Protection Foundation to the cloud. A certificate that is new to Trust Protection Foundation is added to the inventory in Monitoring status and Disabled for local processing, so the cloud product remains the primary control plane for cloud-native certificates while you keep centralized visibility across both environments. A certificate that Trust Protection Foundation already manages is never disabled by an import, even when the cloud copy is expired or revoked. Its earlier metadata moves to the History tab and your enrollment and management settings are preserved.
Use these procedures to import certificates from Certificate Manager - SaaS or NextGen Trust Security into your Palo Alto Networks Certificate Manager - Self-Hosted instance. Importing into a single system gives you centralized visibility of certificates across both environments during your transition to the cloud.
Trust Protection Foundation provides a separate import job for each cloud product. Choose the job that matches the product your certificates live in. The two jobs behave the same way once certificates reach Trust Protection Foundation; they differ in how they authenticate and how you identify the cloud instance.
Considerations for importing cloud certificates
Before importing certificates, consider the following:
-
Monitoring State: Certificates that exist in the cloud product but not in Trust Protection Foundation are imported in Monitoring status and Disabled for local processing. If a certificate object already exists in Trust Protection Foundation, the import process does not change its enrollment or management status.
-
One-Way Synchronization: Certificate data flows only from the cloud product to Trust Protection Foundation.
-
Import Job Filtering: The import job honors your configuration for expired and revoked certificates. An expired or revoked cloud copy never disables a certificate that Trust Protection Foundation already manages; the superseded metadata moves to the History tab instead.
-
Credentials for Certificate Manager - SaaS: You must have an API key (also called an API credential) with access to Certificate Manager - SaaS. See Obtaining an API Key in the Certificate Manager - SaaS documentation.
-
Credentials for NextGen Trust Security: You must have a NextGen Trust Security built-in account with a key pair, stored in Trust Protection Foundation as a private key credential that holds the account's client ID and its RSA or EC private key. Create the account in Strata Cloud Manager under System Settings > Certificate Settings > Built-In Accounts; you can let it generate a key pair for you or supply your own RSA or EC key. The account must use the Certificate Lifecycle use case. A built-in account serves one use case only, so a Kubernetes discovery job needs an account of its own.
-
Region and tenant: A Certificate Manager - SaaS job imports from one region, which you select when you create the job. A NextGen Trust Security job has no region setting. You supply the tenant service group (TSG) ID instead, and the job builds the tenant's data plane address from it.
-
Network Connectivity: Ensure connectivity exists between Palo Alto Networks Certificate Manager - Self-Hosted and the cloud environment you are importing from.
-
Kubernetes: Kubernetes-issued certificates are not included in a Certificate Manager - SaaS import and must be managed separately. For NextGen Trust Security, import them with a NextGen Trust Security Kubernetes discovery job. The NextGen Trust Security certificate import job skips any certificate that Kubernetes discovery found, so the two jobs never import the same certificate twice.
-
Import Frequency: Avoid frequent full imports, which are resource-intensive. Use scheduled incremental imports for ongoing visibility.
Import certificates from Certificate Manager - SaaS
Importing certificates involves creating and running a job configured credentials, regions, folder locations, and other settings. The job scans the Certificate Manager - SaaS system for new certificates and already-imported certificates that have changed status since the import job last ran. The job updates the destination sub-folders with new certificates information.
-
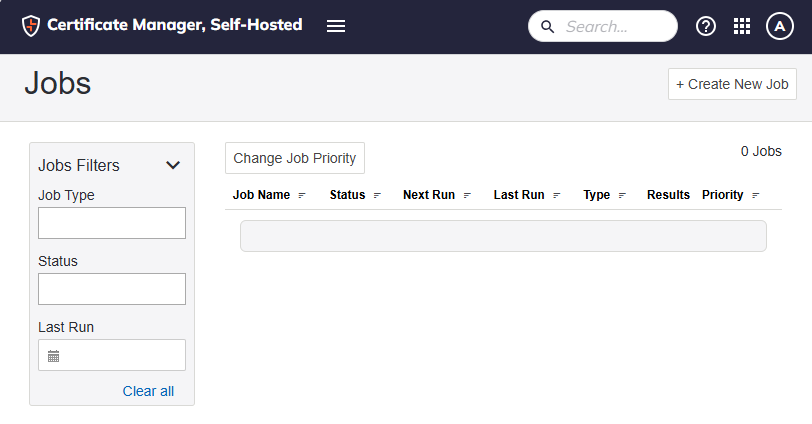
From the Certificate Manager, console, navigate to Configuration > Jobs.
-
Create a new job by clicking + Create New Job.
-
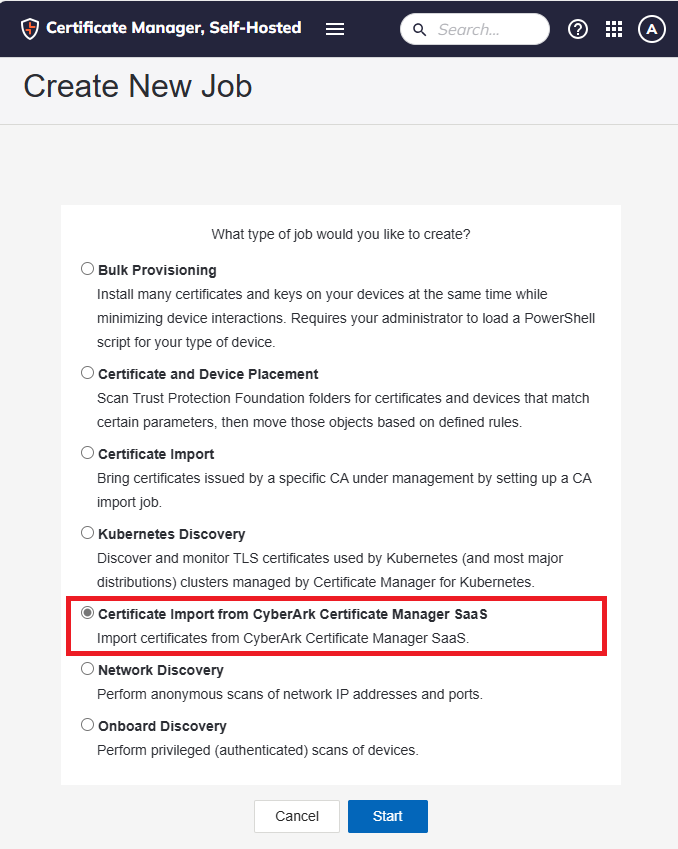
Select the type of job.
-
Choose Certificate Import from Certificate Manager - SaaS.
-
After creating the job, you can later change most of the job settings by accessing the job on the Jobs page.
-
-
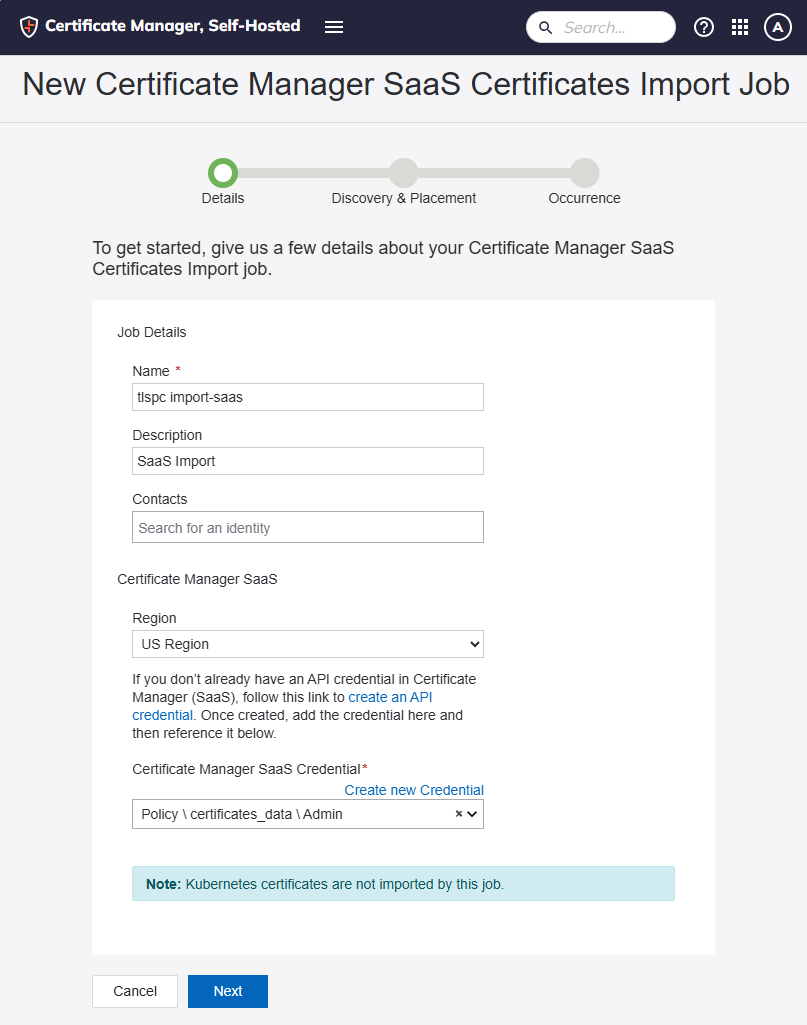
Define job details.
-
Enter name, description, and contacts for the job.
When creating a job, avoid using special characters (such as !, @, #) in the job name. Job names should consist of alphanumeric characters and standard punctuation only. Using unsupported special characters may result in errors or prevent the job from being created successfully.
-
Select the region where the Certificate Manager - SaaS instance is hosted.
Only one region can be selected for each job.
-
Specify a Certificate Manager - SaaS API credential.
If you do not have a password credential for your Certificate Manager - SaaS API key, use the Create new Credential link to create a new password credential, and specify the API key as the password.
-
-
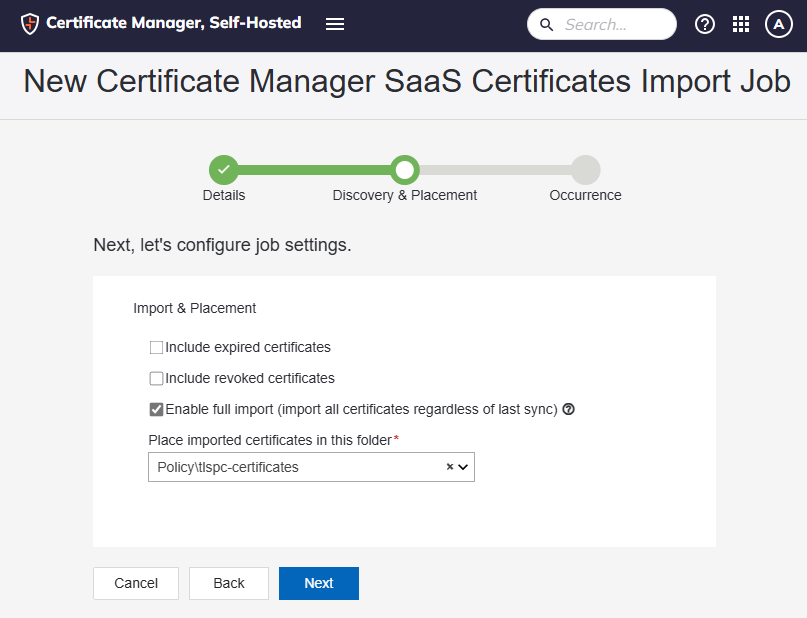
Configure job settings for discovery and placement.
-
Include expired certificates
-
Include revoked certificates
-
Enable full import (imports all certificates, not just new ones) vs. an incremental import.
Full import means scanning all certificates in the Certificate Manager - SaaS environment, no matter when they were created or changed. This is different from an incremental import, which only scans certificates modified after the last scan.
When you choose the Full Import option, the job runs with the option enabled but clears the checkmark for the next time the job runs. The next time the job runs, it will run as an incremental import. If you want to run the job again as a full import, you must again manually select the Enable full import option.
-
Choose the destination folder for placing the imported certificates. The job automatically creates sub-folders within the destination folder.
-
-
Specify when you want the job to run.
-
You can choose to run manually, every week, every month, or every year.
-
-
Click Create Job or click Create & Run.
-
The job is created and appears on the Jobs page for you to run.
-
-
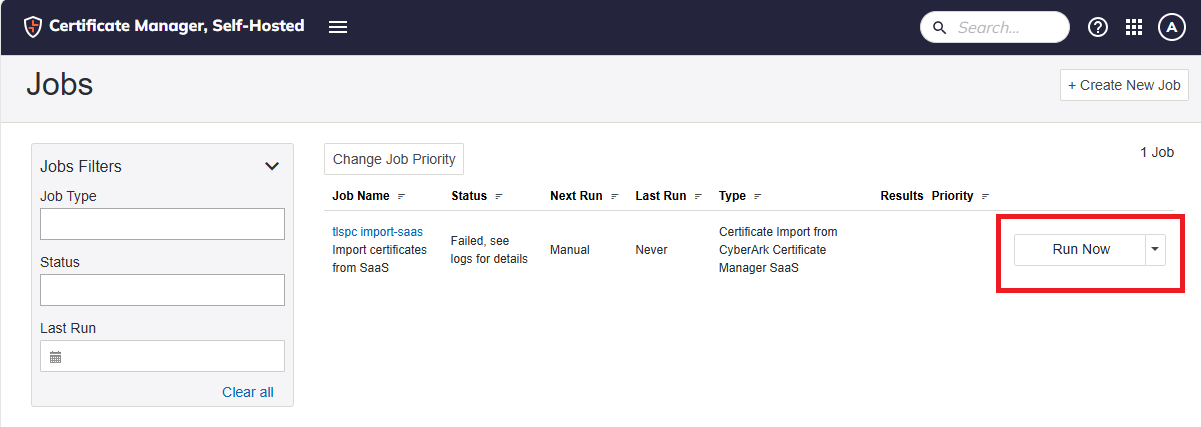
Navigate to the Jobs page, then run the job by clicking Run Now.
-
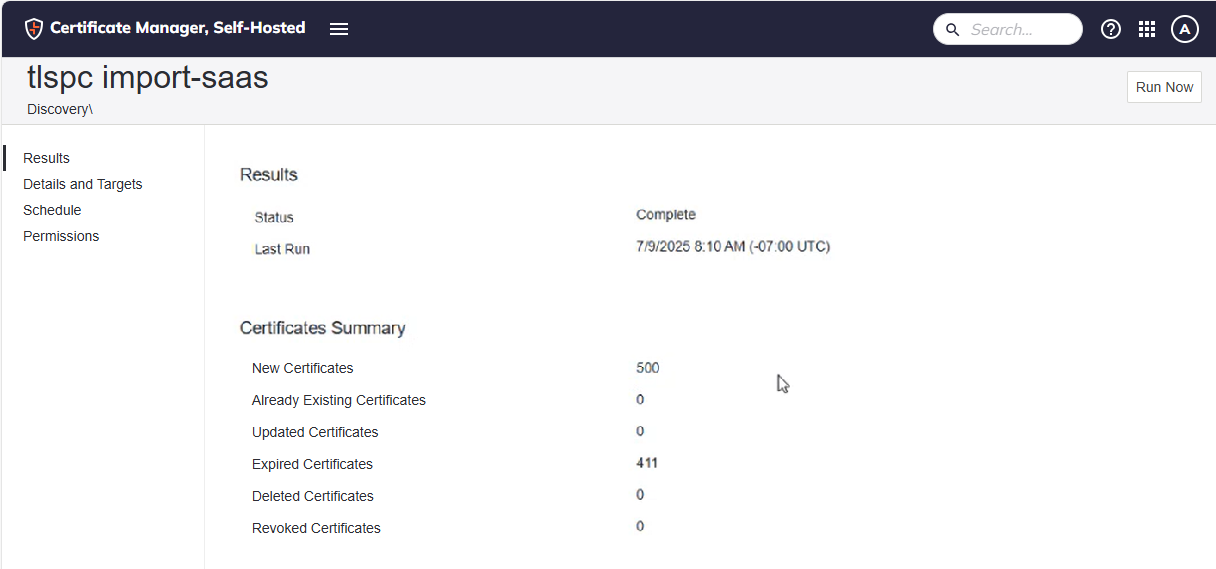
View the Certificate Summary Report by clicking the completed job listed on the Jobs page, then clicking Results.
-
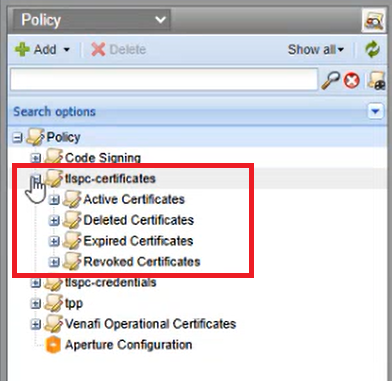
View the discovered and imported certificates by navigating to the destination folder specified in the job's details and targets.
-
The import process places certificates into the destination folder you specified when you created the job.
-
The import process automatically creates sub-folders in the destination folder.
-
Import certificates from NextGen Trust Security
A NextGen Trust Security certificate import job scans one NextGen Trust Security tenant for new certificates and for already-imported certificates whose status changed since the job last ran, then files them under the destination folder you chose. The job reaches the tenant over its own data plane address rather than a shared gateway, so you identify the tenant by its TSG ID instead of by a region.
-
From the Certificate Manager, console, navigate to Configuration > Jobs.
-
Create a new job by clicking + Create New Job.
-
Select NGTS Certificate Import, then click Start.
After creating the job, you can later change most of the job settings by accessing the job on the Jobs page.
-
Define job details.
-
Enter name, description, and contacts for the job.
When creating a job, avoid using special characters (such as !, @, #) in the job name. Job names should consist of alphanumeric characters and standard punctuation only. Using unsupported special characters may result in errors or prevent the job from being created successfully.
-
Under NGTS Built-In Account, enter the TSG ID of the NextGen Trust Security tenant you are importing from.
The job builds the tenant's data plane address from this value. There is no region to select.
-
Select the Built-In Account Credential.
This is a private key credential holding the account's client ID and its RSA or EC private key, not a password credential. The account must use the Certificate Lifecycle use case; an account scoped to anything else cannot read the tenant's certificates.
If you have not stored the account's key pair yet, click Create Private Key Credential and complete the dialog: enter the account's client ID in User Name, then paste the key into Private Key in PEM format or click Load from File. Supply Private Key Password only if the key is encrypted.
-
-
Click Next, then configure the Discovery & Placement settings.
-
Include expired certificates. NextGen Trust Security reports a certificate that is no longer current as Retired, and the job treats a retired certificate and one that is past its expiration date the same way.
-
Include revoked certificates. A certificate that is both revoked and expired counts as revoked.
-
Enable full import (imports all certificates, not just new ones) vs. an incremental import.
Full import means scanning all certificates in the NextGen Trust Security tenant, no matter when they were created or changed. This is different from an incremental import, which only scans certificates modified after the last scan.
When you choose the Full Import option, the job runs with the option enabled but clears the checkmark for the next time the job runs. The next time the job runs, it will run as an incremental import. If you want to run the job again as a full import, you must again manually select the Enable full import option.
-
Delete missing certificates. When this option is set, a full import also sweeps for certificates that are no longer present in the tenant and moves them to the Deleted Certificates sub-folder. The sweep runs only on a full import, and only after the job has completed at least one earlier run to compare against.
-
Choose the destination folder for placing the imported certificates. The job automatically creates the Active Certificates, Expired Certificates, Revoked Certificates, and Deleted Certificates sub-folders within it and files each certificate according to its state in NextGen Trust Security.
-
-
On the Occurrence step, specify when you want the job to run.
-
Click Create Job or click Create & Run.
-
Navigate to the Jobs page, then run the job by clicking Run Now.
-
View the results by clicking the completed job on the Jobs page, then clicking Results.
The summary counts new, already managed, updated, expired, revoked, deleted, and moved certificates for the run.
If the job will not accept the built-in account
The Details step authenticates against the tenant before you can continue, so a problem with the account or the tenant appears there rather than when the job runs.
-
The credential is rejected as soon as you select it: Confirm that it is a private key credential, that its user name holds the built-in account's client ID, and that a private key is stored in it. A credential whose save did not finish can exist with an empty key, which looks the same from this screen.
-
A credential that worked before stops working: Check its expiration date. The credential is re-checked each time the job runs, so a job saved before the expiration date still stops once that date passes. Update the date or select another credential.
-
The tenant is not found: Verify the TSG ID. The job builds the tenant's data plane address from it, so an incorrect value fails before any certificate is read.
-
The tenant resolves but authentication fails: Confirm that the built-in account uses the Certificate Lifecycle use case, and that the client ID stored in the credential belongs to that account.
Import Kubernetes certificates from NextGen Trust Security
Certificates that NextGen Trust Security discovered on a Kubernetes cluster are imported by a NextGen Trust Security Kubernetes discovery job rather than by the certificate import job described above. Unlike the certificate import job, a Kubernetes discovery job also creates the application objects that represent where each certificate is installed, so the cluster, namespace, and container context comes across with the certificate.
Configure a Kubernetes discovery job the same way, with two differences:
-
The job needs its own NextGen Trust Security built-in account, using the use case that grants access to certificates discovered on Kubernetes clusters. A built-in account serves one use case, so it cannot be shared with a certificate import job.
-
The job records the cluster and namespace each certificate came from, and creates the matching objects in Trust Protection Foundation automatically.