Setting up Certificate Verification for securing outbound HTTPS connections
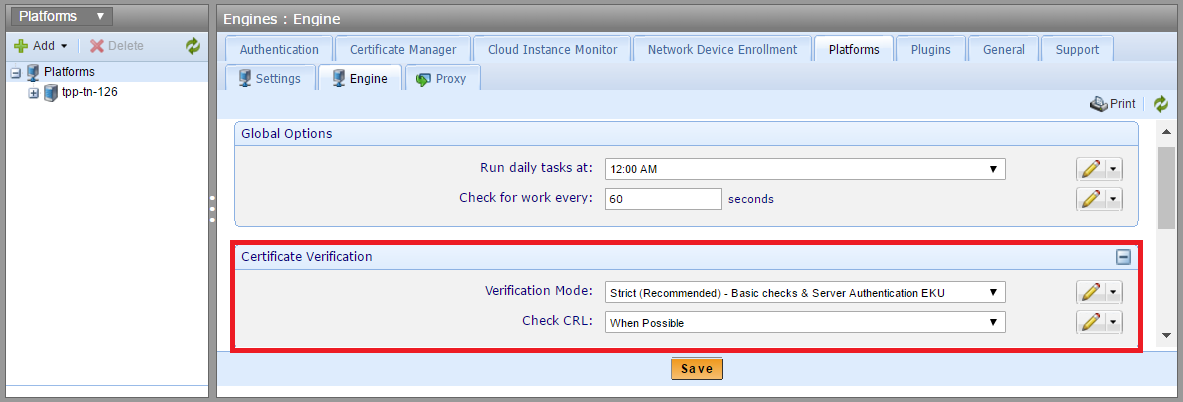
The Certificate Verification settings allow a secure HTTPS connection for a server that presents a valid certificate, which is not currently on a Certificate Revocation List (CRL). There are two parts to the setup:
- You can use the Verification Mode to confirm that the certificate is valid. Based on the setting, Trust Protection Foundation checks various fields on the certificate. If the information is valid, Trust Protection Foundation allows a secure connection with the server.
-
You can use the Check CRL setting to determine the status of the certificate that the server presents at the time of connection. If the certificate appears on a (CRL), Trust Protection Foundation will refuse the connection even if the certificate is valid.
NOTE Don't confuse this setting with CRL Verification, which periodically checks stored Trust Protection Foundation certificates. For more information, see Enabling CRL Verification.
To set up certificate verification
- From the Certificate Manager - Self-Hosted menu bar, click Policy Tree, then open the Platforms tree.
- Click the root of the Platforms tree to see the individual Trust Protection Foundation servers.
-
Do one of the following:
- To make global changes, click the Engine tab.
- To configure a specific server, select a Trust Protection Foundation server, and then click Settings.

-
Scroll down to the Certificate Verification section.
-
In the Verification Mode, select one of the following options and set the level of certificate checking:
- None (Not Recommended) - No verification: (Default) Allow the connection to the server. If the certificate would have failed the Basic or Strict certificate verification, log a Certificate Verification Warning event message.
-
Basic - Checks expiration, revocation, common name mismatch & root chain: Check for an expired certificate, CN mismatch, invalid chain, inability to chain back to a trusted root, and whether one or more of the certificates in the chain has an invalid CA certificate. If any of these checks are invalid, refuse the connection and log a Certificate Verification Failed event message. If the certificate would have failed the Strict certificate verification, log a Certificate Verification Warning event message.
-
Strict (Recommended)- Basic checks & Server Authentication EKU: Do the same checking as with the Basic certificate verification. Reject a certificate if it failed the Basic certificate verification. Also, if the Server Authentication (EKU) is present on the certificate, verify the value. Reject an otherwise valid server certificate that lacks the Server Authentication Purpose information in the EKU. For rejected certificates, refuse the connection with the server and log a Certificate Verification Failed event message.
-
In the Check CRL, select one of the following options:
- Never: Bypass CRL checking. Establish the HTTPS connection based on certificate values.
- When Possible: (Default) If the certificate is valid, determine whether it is currently on the CRL. If the certificate is revoked, refuse the connection and log a Certificate Verification Error event message. However, if the CRL cannot be retrieved, allow the connection.
- Always: If the certificate is valid, always determine whether it is currently on the CRL. If the certificate is revoked or cannot be verified on the CRL, refuse the connection. Log a Certificate Verification Failed event message.
-
If you selected None (Not Recommended) for Verification Mode, you need to specify whether the system should Log warnings when problems are detected with certificate.
-
Yes: Warning events are logged.
Note that if the Trust Protection Foundation server does not trust the chain, or if there is a self-signed certificate, you may see many certificate verification warning events logged.
- No: (default): Warning events are not logged.
-
- Click Save.
- Restart IIS and all CyberArk services.
IMPORTANT Syslog channel drivers can't recognize changes you make to either the Allowed Outbound SSL/TLS Versions settings or Certificate Versions settings. Therefore, following any changes to those settings, please restart the CyberArk Log Server Windows service. For details, see Manually stopping and starting the log server service.