Key Pair Environment
Follow the steps below to complete setting up a Key Pair Environment.
NOTE As you proceed through these steps, note that some of the fields may not be editable, and some fields may not appear at all. This is based on the Environment Type you selected and the Environment Template settings that your Code Signing Administrator has established.
-
Select a Signing Flow to use for this Environment. The Flow you select will be invoked when the keys associated with this Environment are used.
This field is removed from GPG Environments designated as Issuer Environments since these Environments can't be used for signing.
-
Select a Key Storage Location, which is where the private key will be stored. Selecting Software stores the key in the Trust Protection Foundation Secret Store.
Other options, such as HSMs, may be available based on key storage locations configured by your Code Signing Administrator. If you plan to import an existing key currently stored on an HSM, select the HSM that stores that key.
-
In Creation Type, choose whether you want to Create new key, Import existing key, or Use existing key in HSM.
NOTE This field isn't available in Per-User Environments.
Follow the steps below for the creation type you selected.
Create new key
-
For Key Usage, select whether this key will be used for signing or derivation.
-
In the Validity Period field, enter the number of days the key should be valid for. Enter
0for no expiration. -
Select the Key Algorithm for the key that will be created.
Import existing key
-
For Key Usage, select whether this key will be used for signing or derivation.
-
In the Validity Period field, enter the number of days the key should be valid for. Enter
0for no expiration. -
Select your key in the Key File field.
Use existing key in HSM
NOTE This option requires an Environment Template that has a connection the HSM that contains the key. Also, only Code Signing Administrators and Master Admins have rights to create environments that use existing HSM keys.
-
For Key Usage, select whether this key will be used for signing or derivation.
-
In the Validity Period field, enter the number of days the key should be valid for. Enter
0for no expiration. -
From the Private Key drop-down, select the key you want to associate with this Environment. Note that it may take a few minutes to retrieve the key references from the HSM.
-
From the Public HSM Key drop-down, select the public key to associate with this Environment. This list is populated after you select the private key.
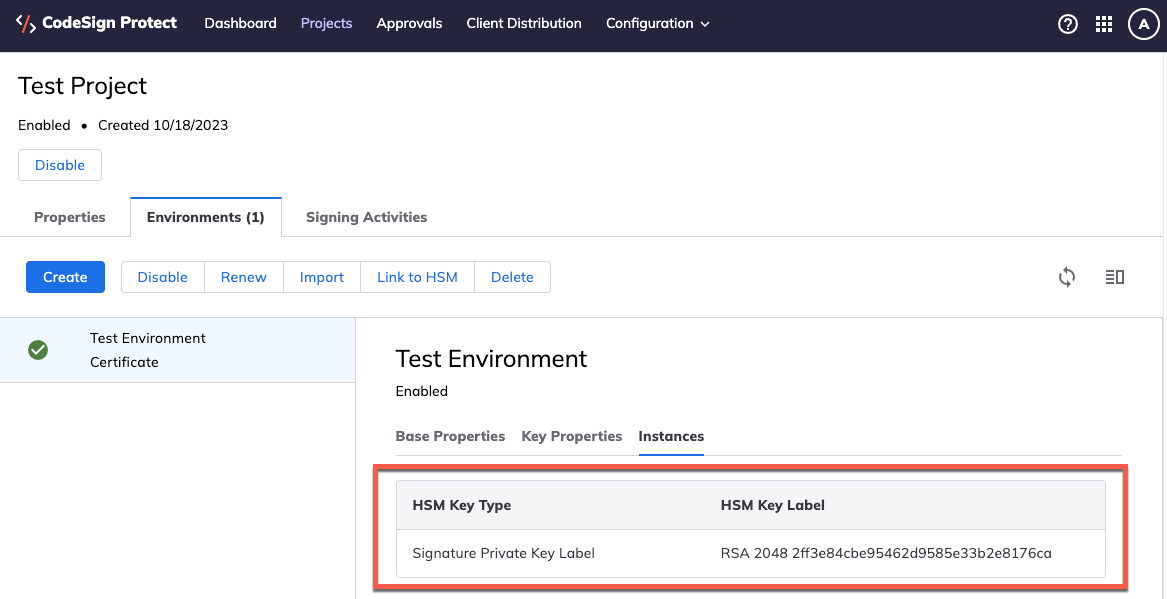
After you finish creating the Environment, you'll be able to see the HSM Key Label by opening the Project, selecting the Environment, and then clicking the Instances tab on the Environment properties.
NOTE The HSM Key Label is shown for single key Environments only.
-
-
Click Create Environment.
What's Next
If you need additional Environments as part of this Project, you can create those now. A Project can have as many Environments as needed, and the Environments can be any type.
If you're done creating Environments, you can submit your Project for approval.