Creating Local groups and teams
To create users and groups, you must have Read, Write, and Create permissions to the Local Identity object.
To create a team
- From your profile picture icon, click My Teams.
- Click Create Team.
- [Optional] Provide a team Description, if desired.
- Enter the Team Name.
- Select the products this team can access.
- Add one or more Team Owners by typing the name of the identity.
- [Optional] In the Team Members box, begin typing the name of an identity, then click it in the list, then repeat for as many identities you want to add to the group.
- Click Create.
To review how to create teams in the Web SDK, see POST Teams .
- From the Platform menu bar, click Policy Tree
- Select the Identity tree from the Tree drop-down menu.
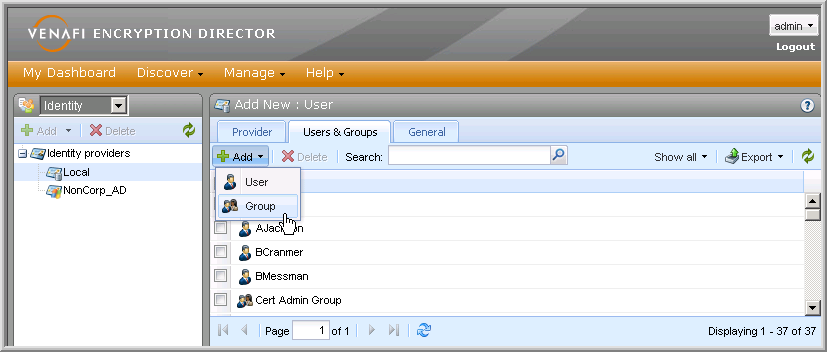
- In the Identity tree, select the Local user directory.
-
Click the Users & Groups tab, and then click Add > Group.

-
The Group Information box displays the Local Group object configuration settings.

- Define the group name.
-
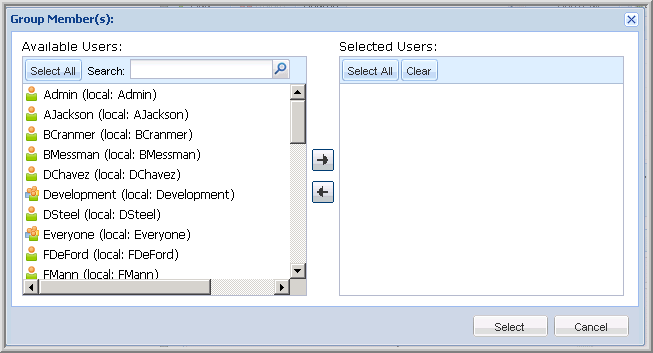
Click the Browse button to add group members.

-
From the Available Users list, select the users and groups you want to add to the current group, and then click the Right-arrow
 to move them to the Selected Users list.
Press Shift+click to select multiple, contiguous users and groups.
Press Ctrl+click to select multiple, discontiguous users and groups.
- Click Select to add the members to the group.
- Click Save to create the group.