Code Sign Manager - Self-Hosted user and task flow
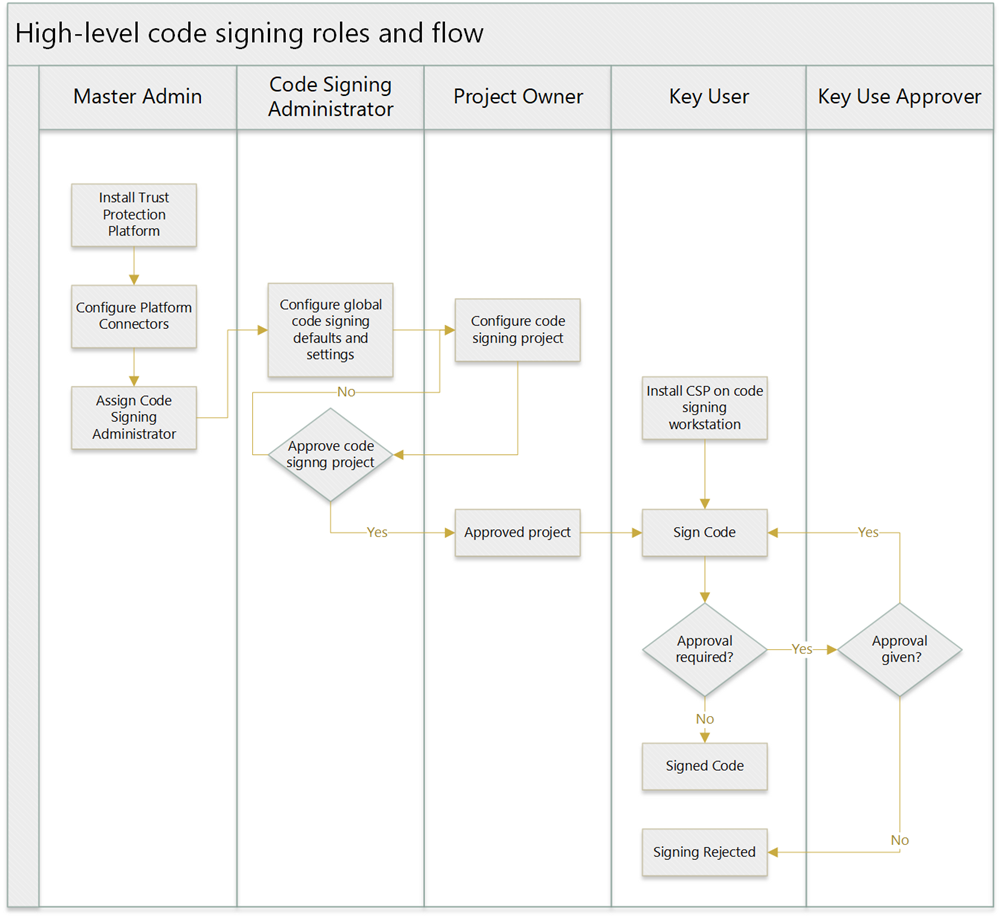
In order to secure the use of private code signing keys, CyberArk Code Sign Manager - Self-Hosted has the ability to distribute responsibilities across a number of user roles. The following flowchart provides an overview of the CyberArk Code Sign Manager - Self-Hosted process and describes which role is responsible for each high-level step in the process.
Each step in the flowchart has one or more tasks associated with it, which are detailed below the flowchart. To jump directly to the details about a step, click that step in the flowchart.
Install Trust Protection Foundation
| Performed by | Master admin |
|
Interface |
CyberArk Trust Protection Foundation installation wizard |
|
Tasks |
Configure Trust Protection Foundation connectors
| Performed by | Master admin |
|
Interface |
CyberArk Configuration Console |
|
Tasks |
Assign Code Signing Administrator
| Performed by | Master admin |
|
Interface |
CyberArk Configuration Console |
|
Tasks |
Configure global code signing settings
| Performed by | Code Signing Administrator |
|
Interface |
Code Signing MMC Snap-in |
|
Tasks |
Configure code signing projects
| Performed by | Owner |
|
Interface |
Code Sign Manager - Self-Hosted web interface |
|
Tasks |
Approve code signing projects
| Performed by | Code Signing Administrator |
|
Interface |
Code Sign Manager - Self-Hosted web interface |
|
Tasks |
Install the CSP on code signing workstations
| Performed by | Key Useror IT department |
|
Interface |
CSP installation wizard |
|
Tasks |
Sign code
| Performed by | Key User |
|
Interface |
Standard signing applications |
|
Tasks |
Sign code with existing signing applications using certificates managed by Trust Protection Foundation. See Integrating signing applications with Code Sign Manager - Self-Hosted. |
Approve use of private key
| Performed by | Key Use Approver |
|
Interface |
Code Sign Manager - Self-Hosted web interface |
|
Tasks |