Creating a network discovery job
You can create Network Discovery jobs that scan specific IP addresses, CIDRs, hostnames, and ports to locate certificates. Network discovery jobs can be run on demand or according to a customized schedule (see Scheduling a job).
When the CyberArk SSH Manager for Machines product is installed in your environment, you should be aware of the following items:
- When the placement rules portion of a discovery is run, device objects are created and placed into the policy tree in the location specified in the first matching rule.
-
The device object has
DN=hostnameof the discovery result.If there is no hostname, the device's IP address is used as the hostname.
- The hostname or address fields are filled with the full hostname or IP address if there is no other data to enter in these fields.
-
If the DN for a discovered device object already exists in the same folder, a duplicate object is NOT created; however, if the DN for a discovered object already exists in a different folder, the second device object IS created (unless already created by the same job previously).
Both device objects will be present in the tree.
To create a new
-
From the Certificate Manager - Self-Hosted menu bar, click Configuration > Jobs.
(Optional) To filter the Jobs list by one or more specific job types, use the Job Type filter. See Filtering the Jobs list by job type.
-
Click + Create New Job to start the Create New Job wizard.
-
On the Create New Job page, click
-
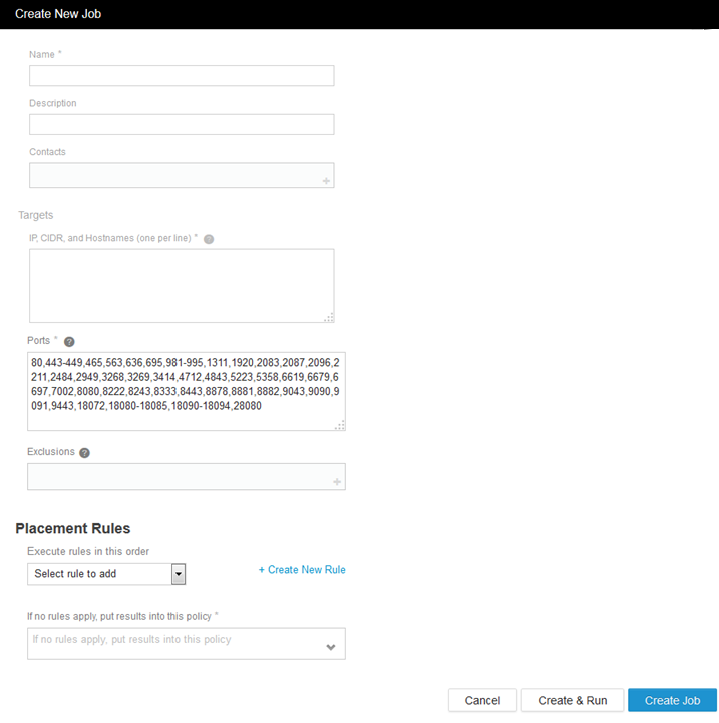
In the Create New Job window, enter details about the job.
- Targets: Each line can contain a single IP address, a hyphenated range of IP addresses, a CIDR address range, or an individual host name. You can also enter a target in an IP address:Port format, for example, 192.168.1.1:443.
-
Update certificate configuration on rediscovery: When enabled, the discovery job updates the certificate object's configuration (such as Subject Alternative Names) when it rediscovers a certificate that has been modified outside of Trust Protection Foundation. This ensures that subsequent renewals include the latest certificate configuration. When disabled, the job still logs when certificates with updated configurations are found, but does not update the certificate object.
NOTE When this setting is enabled, the discovery summary displays a count of certificate objects updated by this feature, with a link to view those certificates in the inventory.
-
Placement Rules: To create a placement rule, click + Create New Rule.
-
Exclusions: Addresses, ports, CIDRs, and host names that should not be scanned.
See Specifying discovery exclusion objects.
-
Do one of the following:
- When you're done, click Create Job.
-
(Optional) If you want to run the job immediately, click Create & Run.
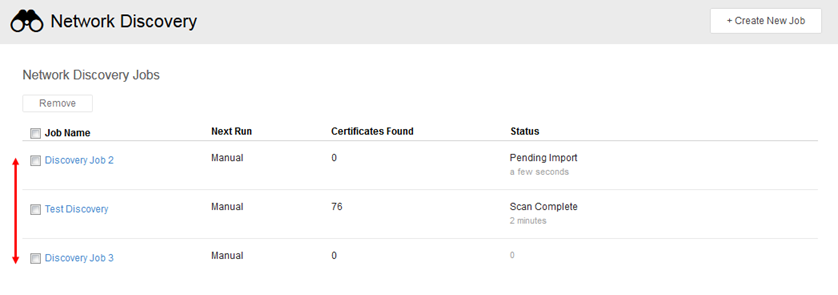
Your job list will look something like this:
NOTE When you pause and resume a discovery job, the statistics can show that more things were scanned than you expect. This is normal behavior, a result of the way scan groups are created and processed.
TIP As with placement rules, you can reorder the priority of each job by dragging and dropping it in the list.
When you create a new job, you must specify where items are to be placed when no placement rules apply.
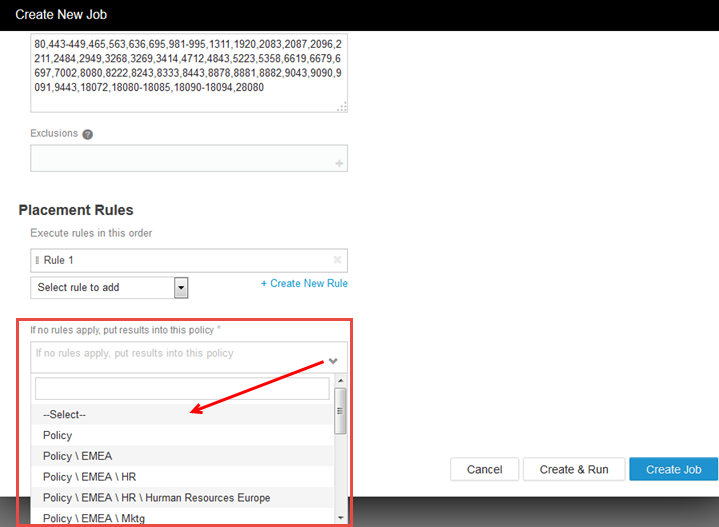
BEST PRACTICE It's a good idea to make the Management Type of the default policy unassigned. You can then move these certificates and keys from the unassigned default policy to their correct managed folders.
Unassigned: Unlicensed Trust Protection Foundation certificates and keys that do not allow network validation, expiration monitoring, enrollment, provisioning, or onboard validation. However, they are included in selected reports and on the dashboard.